Aug 26, 2024
Start Configuring the Chat AI
Customize your AI assistant to perfectly match your brand and deliver an unforgettable experience to your customers! This is not just any AI – it's a true extension of your team, recognizing both you and your customers at every moment, and providing highly personalized service. Shape it according to your needs, make it an integral part of your brand, and strengthen the connection with your customers!
What is Customize?
In the Customize area, you can adjust your chat image coloring and logo according to your preferences, such as positioning, user experience, etc. Customization options generally allow you to fine-tune the behavior and appearance of the app.
Below you can find out what you can do step by step for each feature:
Branding Settings
Customize your Chat AI's appearance and communication style in more detail according to your personal preferences.
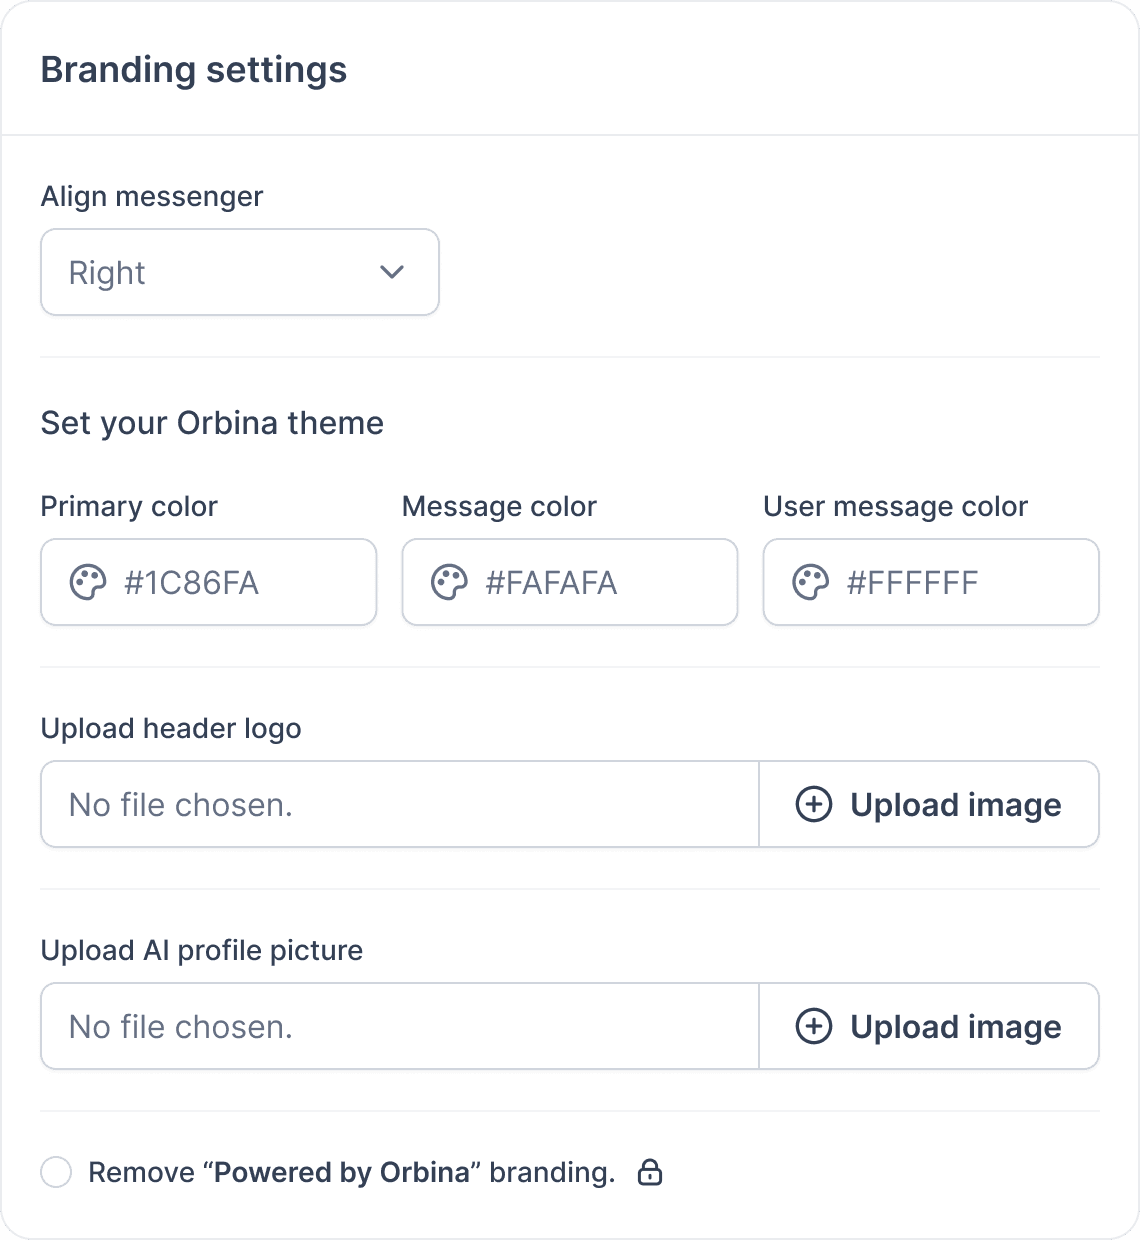
Align Messenger
When communicating in your Chat AI, you can specify which side the first message will start from as the message button.
Set Your Orbina Theme
Primary Color: This field allows you to set the primary color used in the overall theme of the chatbot. You can select a color of your choice by clicking on the color palette. For example, here a shade of purple is selected.
Message Color: You can set the background color of the messages that the Chatbot sends you from this area. If a color is not selected, it will be gray by default. You can customize it by selecting the color you want from the color palette.
User Message Color: You can set the background color of the messages that users send you from this field. Choose a suitable color from the color palette. Here a purple color is preferred.
Upload Header Logo: This field allows you to add a logo to the header of the chatbot. Click the "Upload image" button to select and upload a logo file from your computer. This logo will serve as a visual branding element in your chatbot's interaction with users.
Upload AI Profile Image: This area, where you can add your chatbot's profile image, creates an image that users will see during the chat. You can select and upload your profile image by clicking the "Upload image" button. This image is a great way to personalize your chatbot and create a more intimate interaction with users.
Initial Message
The initial message in a Chat AI is an important step to establish a sincere connection with the user and set the direction of the conversation. If you wish, you can turn off the use of the first message by checking the "Hide Message" button.
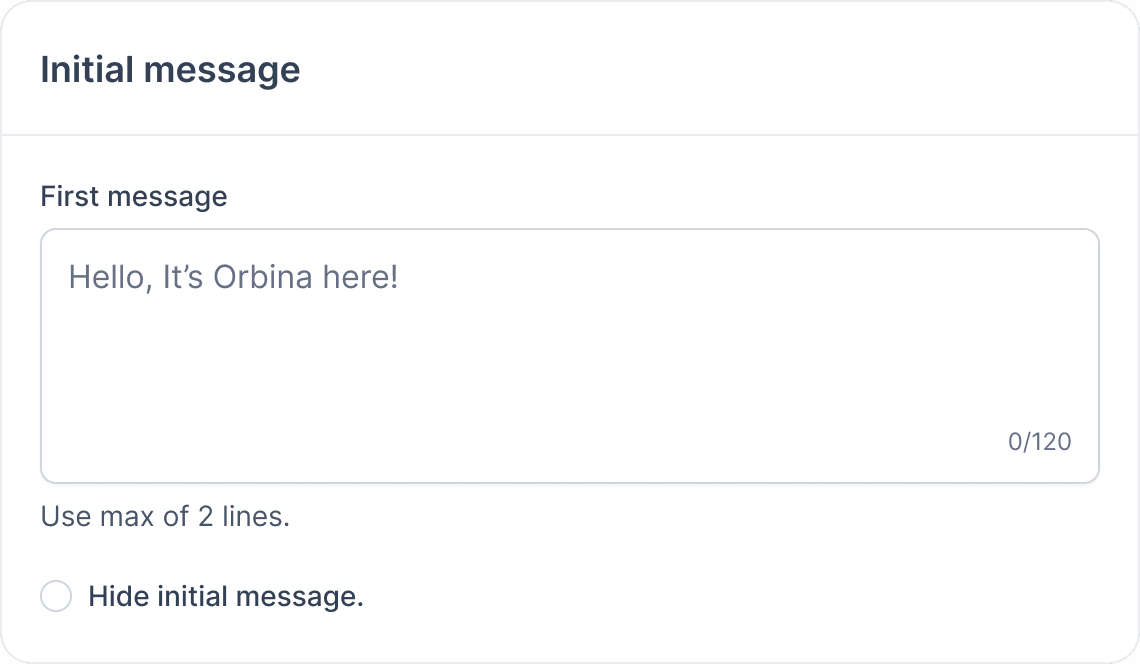
💬 Initial Message Examples;
Hello! How can I help you today?
Hello! Do you want me to recommend you a product?
Hey! Are you aware of our new campaigns?
Hi! How can I make your day better?
Hello! How can I help you today?
Quick Message for User
Enable this feature to make your users easily send a quick message to your Chat AI. These messages can be messages that you want to collect data from the user and are located in the start cover of the chat.
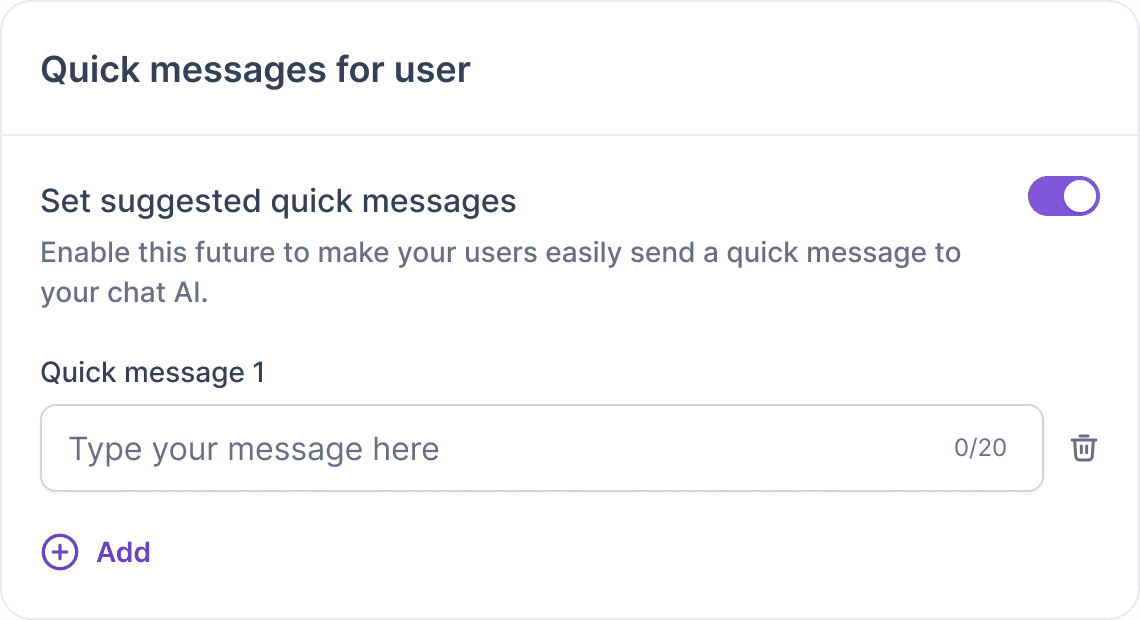
✍🏻 Quick Message Examples;
What ongoing campaigns do you have?
Can I learn about your discounted glasses?
Could you provide detailed information on how to take advantage of your free shipping offers?
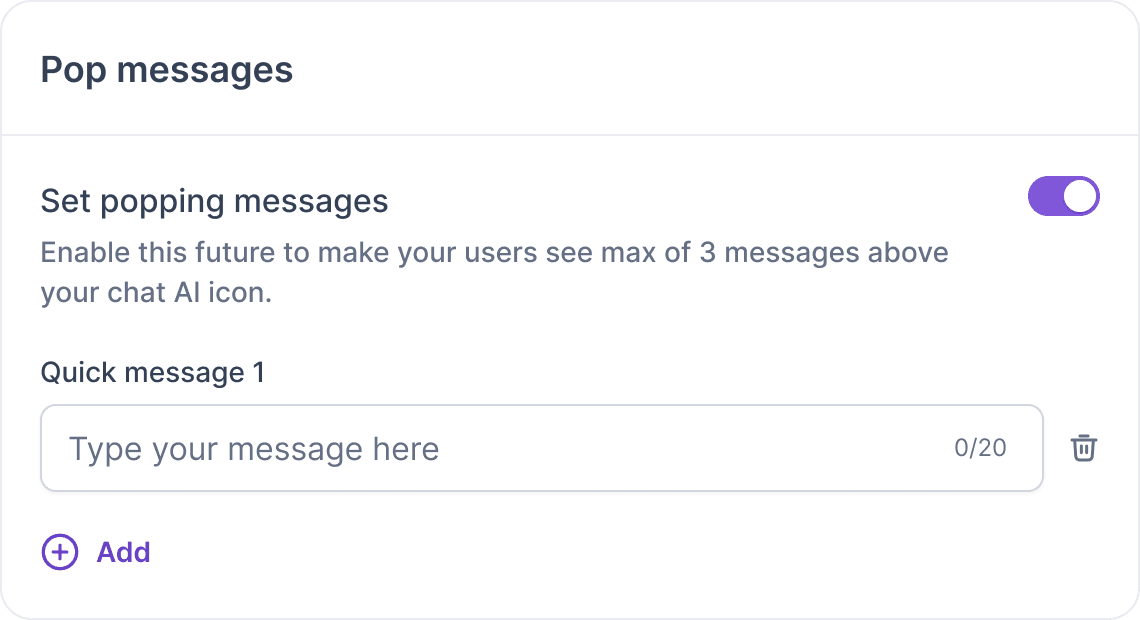
Pop Messages
Enable this feature to make your users see max of 3 messages above your Chat AI icon. This feature is ideal for improving the user experience and making it more convenient to follow messages.
Finally
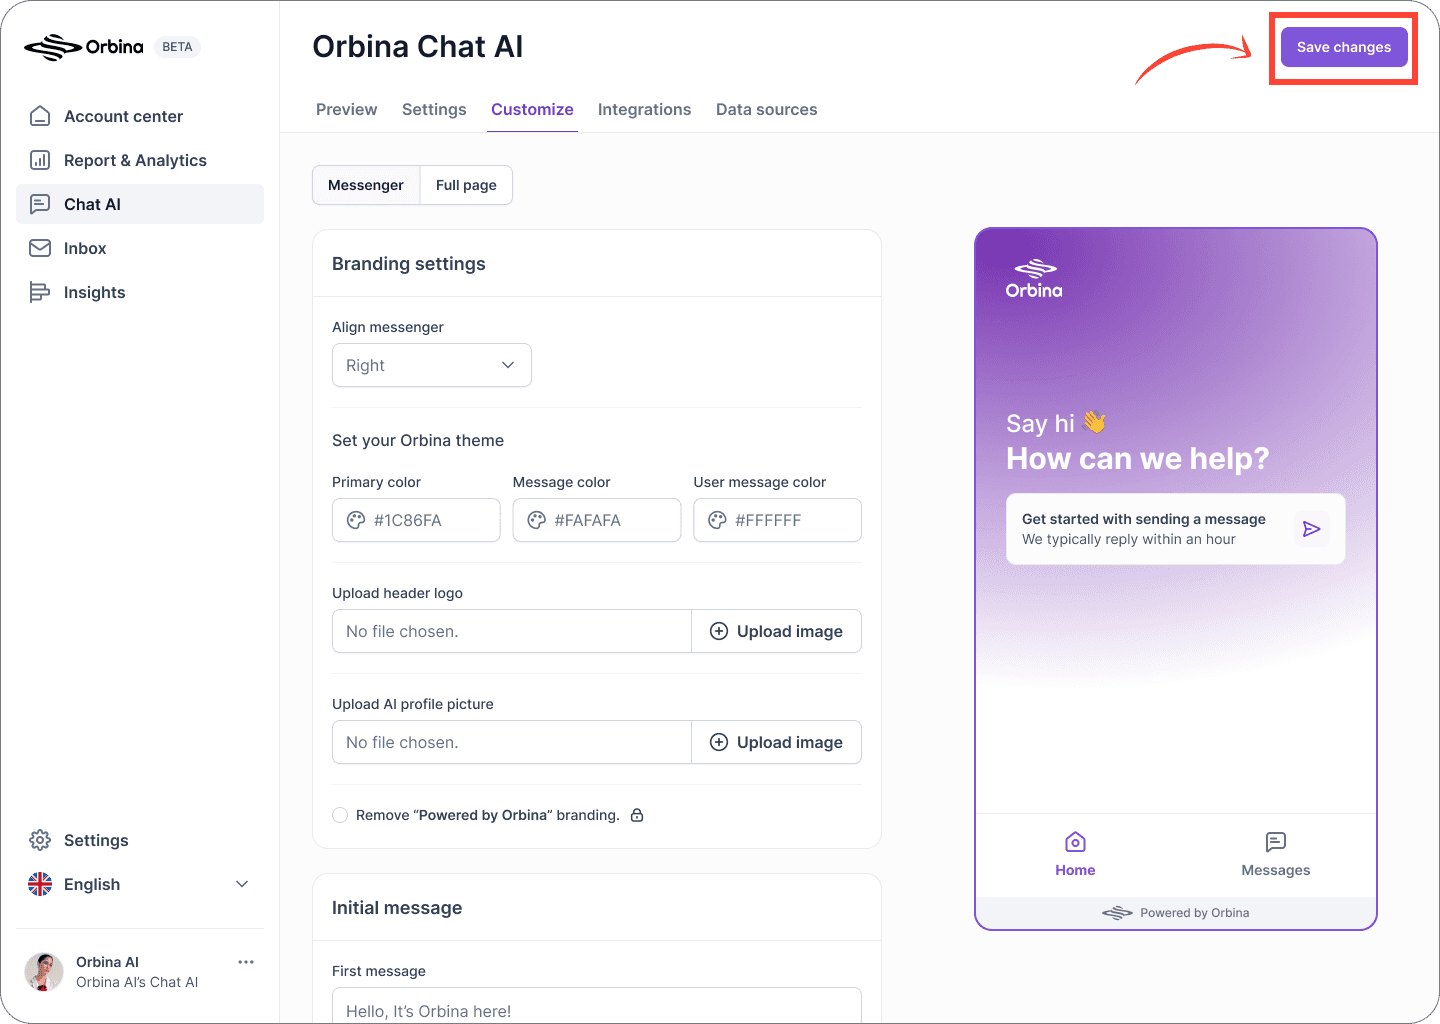
Once you have edited all your settings, first click the "Save Changes" button and save all your changes.
Then you can see the changes in your chat on the right side of the panel.
💡Tip
Need more help? Get support at info@orbina.ai
Find answers and get help from Orbina Support and Community Experts
